
Podcast: Play in new window | Download (Duration: 43:51 — 91.8MB)
Subscribe: RSS

Please subscribe through Itunes and follow me on Spotify if you can
![]()
Scroll down to read my wife’s blog post on how she made a great Scooby Doo cake but before that press play and listen to this week’s episode that includes some great tracks
Little Death Machine – Pale, Logan Stryx – The Best of Friends, George Wilding – My Backwards Head, Valerio Lysander – Cotton, The Infatuations – Tonight We Celebrate, Oceans – Far From You, Uncle Arthur – Dahab Day, Nick Tann – Parallel Lines.
And now a post from this week’s guest blog https://cakeycakey.wordpress.com/
Scooby Doo Mystery Machine birthday cake
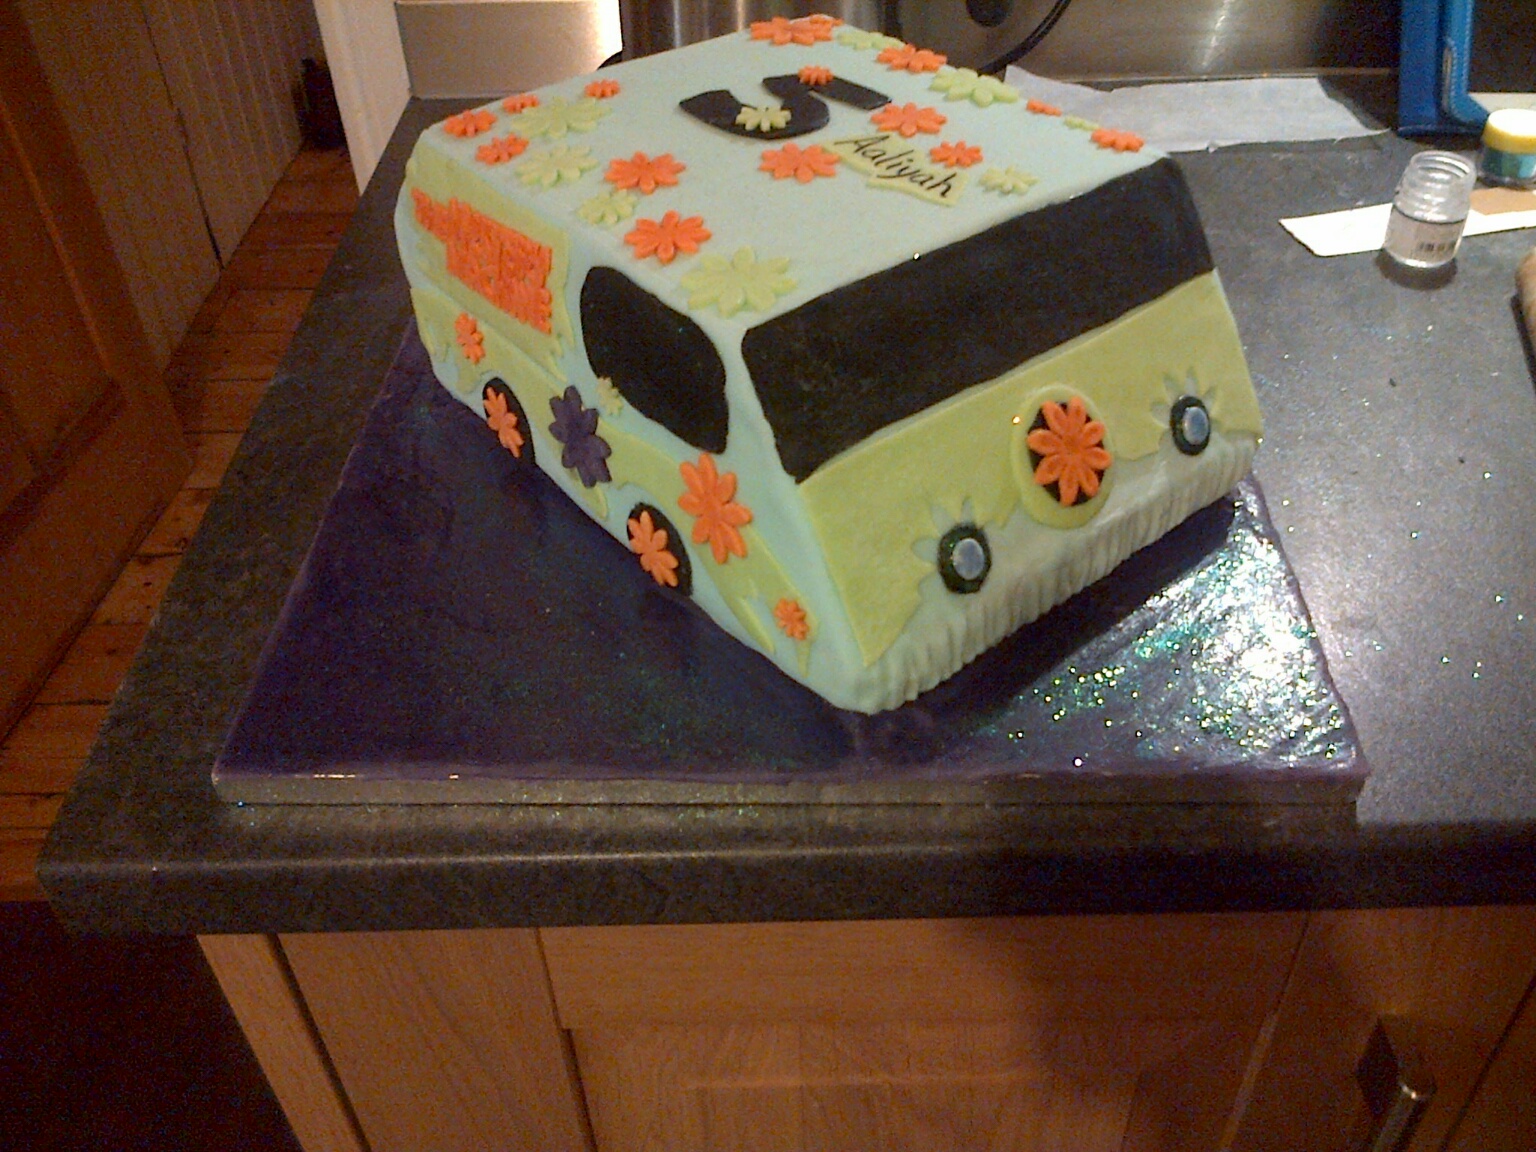
For my granddaughter’s 5th birthday I agreed to make a Scooby Doo Mystery Machine cake – to go with the theme of the party. Never having made such an ambitious cake before, I did quite a bit of reading and research beforehand as I really wanted it to be a brilliant cake, not an embarrassment.
I found lots of really helpful tips on the internet. Thanks to all those mums who post their experiences online, it is incredibly useful to see what others have done. So, in the spirit of sharing, here is what I did, and learned along the way. The gallery of photos (right, or at the end) shows each of the steps.
1. Make sure you leave yourself loads of time.
This cake took me two days – yes two days! A day of baking and a day of decorating. A friend of mine who makes wedding cakes advised me to do it over two days and she was right.
2. Make a firm cake that can withstand carving.

I baked three large rectangular sponges. I wanted to stack them on top of each other and then carve the shape of the Mystery Machine van. A firm, robust sponge is needed for this, not a normal fluffy Victoria sponge type cake!
The recipe I used was this one – BBC Good Food Easy Vanilla Cake. I used the following quantities for each of the 3 sponges – I used two 12×8 inch rectangular tins, and one 10×8 inch tin.
- 250g pack unsalted butter, softened, plus extra for greasing
- 250g golden caster sugar
- 1 tsp vanilla paste
- 5 large eggs, cracked into a jug
- 100g full-fat Greek yogurt (I used Total)
- 85g plain flour
- 250g self-raising flour
- 3 tbsp semi-skimmed milk
I used my food mixer to cream together the butter, sugar and vanilla with a pinch of salt. Then I added the eggs to the mixer and made sure the mixture was thoroughly beaten. Then I added the yoghurt. Then I turned the mixture out into a large mixing bowl and folded in the flour by hand using a metal spoon. Finally I stirred in the milk.
I was advised to line the cake tins with non-stick baking paper and also grease it with butter. It’s worth the effort!
The cakes each took about an hour to cook at 160 degrees. I baked them one at a time. Use a knife to check if they are done. Then turn out onto a wire cooling rack and leave to get completely cool.
Once cool enough, I wrapped each sponge in cling film and then put them in the fridge overnight. I had read a lot about carving cakes and most people said to freeze them, but I didn’t do that as I was sure that fridge-cold would be firm enough.
3. Get prepared for a day of icing and decorating!

The next morning I took the sponges out of the fridge and to my relief they were nice and firm.
The first step is to build the basic structure of the cake which uses a lot of buttercream. I made this much buttercream for sandwiching in between each layer and also for the outer crumb-coat:
- 350g unsalted butter, softened
- 600g icing sugar
- 2 tsp vanilla paste
Then, simply spread the buttercream between in each layer (be generous!).

4. Carving the shape!
This is the fun part. I made a template from cardboard – just drawn roughly. I then was able to carve the shape of a van.

I found that a sharp serrated knife worked best. Remember to keep your lines straight as you carve. Also I put the cake on top of an upside-down roasting tin so it was raised up high, this allowed me to see what I was doing properly. It was much easier than I thought it was going to be!
5. The Crumb Coat.
Once you are happy with the shape then you need to spread buttercream all over the outside. This is known as the crumb-coat and it forms a good seal around the cake, not only keeping it fresh but also preparing it for icing.

This is quite easy but do take your time. You need to get the buttercream smooth and even all over the cake, because once you add fondant icing later any lumps and bumps will really show through. I used a smoothing tool to get it really even and smooth all over.
6. Get everything you need for icing and decorating.
Take a trip to Hobbycraft to buy ready-coloured fondant icing. It is so much easier than trying to colour your own icing using food colouring – and it is reasonably priced. I used two light blue, one light green, one orange, one black and one purple (which I used to cover the cake board rather than leave it silver).

I would also advise you to buy edible glue along with a small paintbrush and a tiny Stanley knife for cutting.
I also borrowed flower shaped cutters from a friend which were brilliant for making all the flower shapes. I think these really made the difference in terms of the cake looking much more professional.

7. Tips when using fondant.
Once the packets of fondant are opened they start to dry so you need to work fairly quickly. Roll out your fondant using a rolling pin and lots of icing sugar, to stop it sticking, to a thickness of about 5-6mm.
The Mystery Machine van is light blue all over – I rolled out a large rectangle and then draped it over (nearly dropping it!) from front to back. I then added separate pieces for the sides.
Now you can see how important your smoothing of the crumb-coat was. You can use the smoothing tool again to push out any air bubbles in the fondant. If necessary use a pin to let air out and then smooth again. You can also use a little water to join sections of fondant together and hopefully conceal any joins (or mistakes!).

For the Mystery Machine lettering, I simply used tracing paper to copy the graphic and then used a cocktail stick to make an indentation of the design onto my rolled fondant icing. I then cut it out using the tiny Stanley knife. This was incredibly fiddly and took me ages!!

The other shapes were made in a similar way with tracing paper and cutting out with the Stanley knife.
Tip – apply the edible glue to the body of the cake when attaching larger shapes, otherwise the shape will go floppy and break before you get a chance to stick it on. However you can add glue to the smaller flowers as I found this easier for sticking those.
Be creative, add flowers, shapes etc. as you like. And hopefully you will get a brilliant result